Wednesday 31 August 2011

Dreamweaver for Activities (Tan Chin Hwa-1091100273)

I'm done with my part...Actually Adobe Dreamweaver is not that tough, but it's just that you have to make sure everything is linked properly and insert the contents properly.. Basically, I have drag in all the contents from the folder and arrange them accordingly. Then, I link them to the other pages.


As shown above, the highlighted part is the link. Another thing is that, I inserted a flash file and in this case, you have to make sure that the flash file is save in .swf format. If not, it won't work in Dreamweaver. If you don't know how to save in .swf format, just go to File>Export>.swf. That will do. Then, just drag it like the other contents into the Dreamweaver.


Tuesday 30 August 2011

Assignment 3 ( Photoshop and Flash) Tan Chin Hwa-1091100273

To proceed with my assignment 3, I have used the Adobe Photoshop and Adobe Dreamweaver to assist me..
Now I will show you all what I did for this assignment..

First of all, I want to create the buttons for my page which is the Activities for the four places in Pahang. I tried doing the buttons just as I plan which is using vertical text on the pictures of the places. However, they seem hard to read and ugly so I changed my plan. So, now I start off with a picture of the place. 
The picture above is the picture of the cable car in Genting Highlands. Now, I want to add a rectangular box using the Rectangle tool. Then, I change the opacity. After that, I add a Horizontal Text and rotate it. The end result is something like this. 

I did the same for the other 3 buttons. 


Ok, that's all for the buttons. Now, I move on to the images that I want to use for Flash. It is almost similar actually. 


That's about all for Adobe Photoshop. Now, move on to Adobe Flash. First, I import the files to the library. Then, I set the size to 600x500. The, I just drag the image in and resize them. 

After arranging and resizing, then click on the left button and press F8 to convert it to symbol. Then, I change the name to left and choose buttons for the type. I did the same for the right button.

Then, right click on the button and click Actions.

After that, I type the command into the menu. The command is on(release) {gotoAndStop (Frame)}. For the left button, I put 4 as the frame because I got 4 images and the left button would lead the user to the previous image which is the 4th image. As for the right button, I put 2 in the frame blank because it would lead the user to the next image which is the second image. 

I did the same for the other images. Just change the frame number for the command. After that, I press Alt+Ctrl+Enter to test the slide show. It moves very fast but I stop it to check whether the button works or not. 

So, now to make it stop looping back and forth, I want to make it stop so that the user can click the buttons by themself. I press F9 for the actions menu. Then, I put this command. stop();

So, that's it for Adobe Flash. Will move on to Adobe Dreamweaver soon. :)


Transportation and Layout.

I was the one in charge of the layout of the group website and also in charge of the button for transportation.
First, I choose the layout of the website that I wish to work on. After that, I made a table for 5 buttons and also changed the background color of my layout.


Because we were not taught on how to change the colour the of background of the layout, I have to mess with the codes until I find the right coding to change the colour from grey to as seen above, yellow.
I also googled for the codes of the colour because the codes were not provided. As shown above, that is the the layout without the banner and also the buttons.


This is the image of the layout after adding the banner and also the buttons. The table was not transparent and then again, I clicked on the buttons and find the codes and eliminated the table line from 1 to 0 making it transparent. This way the webpage will look neater and nicer. =)


After that, I started working on my button. I worked on the photoshop on the photos for a week before hand. (but my photoshop expired so no photos were captured when I wanted to write this blog)
I inserted my photos inside and after that, 


I inserted my description underneath the photo to explain after on the transportation to get there as shown above.


After all the writing and pasting, I wanted to add a lil originality to the website so I added 

i-love-pahang@ 2011

to the bottom of the website. (footer) 
Finally, I sent the file containing my photos and items to my next group mate Chin Hwa. He will be in charge of the activities. He will delete my content and redo the content but save it as a different html as I save mine as transportation.html.

Thank you.
MeiLin

Monday 22 August 2011

Abdurrahman Syafiq Annes - HISTORY

Description of the individual link:


To introduce Pahang to the site visitors we decided to let them know on the history of Pahang, not like any book history but we let them get to know more of the places and memorial thing that are happening or had been left in Pahang history, such as Culture, Famous Places/Historical places, Food etc, which will be the links that is inside the 'History site'.


Objective of the link:


The objective of the link will be to let people know the origin and history of Pahang, what are the cultures, food, places, etc. So the users will be acknowledge before they actually go and visit Pahang.


Design of GUI


The interface of the design is basically to let people read and view pictures on the history culture, food, and historical places so that people will not be confuse by any confusing interface, because we want to let people read it and understand it well.


Flow chart of the individual site:


The HISTORY link will let user observe more about the history of Pahang, the history will lead people to get to know of Pahang with its culture and all things that is considered as historic.

References:
Group blog: >        http://i-love-pahang.blogspot.com/2011_08_01_archive.html
Personal blog: >     http://1081103461finalproject.blogspot.com/

Joffi Marcaesar - DESTINATION

Description on the individual ideation of the link

The idea of the site is designed to present the places in Pahang that are famously known and most visited over the years by tourist. The link will help the user to know and list where they may want to visit during their visit to Pahang, since Pahang is one of the best place to visit in Malaysia for tourism.


Objective of the link


The objective of the link is to let people know the places around Pahang, so they know what to do during their visit in Pahang. Users will have the opportunity to be prepared and listed where they going to spend the time in Pahang. The link that I create will have like a 'maping' so it will be easier for user to know where the place exactly.


Design of GUI


So here is the interface of the link if the user click into Destination site. On the top will be the banner with the main link right below the banner, and on the side will come new side bar which will show 4 links to the places of the destination in Pahang. Every time the user click on each of the destination (6a/6b/6c/6d) a new site will open with a brief explanation of the 'place clicked' and a little map of how to get to that places.


Flow chart of the Individual Site


After the user  click on DESTINATION link on the HOME page, new page will be pop out which is the main page of the destination, on it user will see 4 links that will direct them to each of the places they want to visit, that has more explanation and map of the places' link they clicks

References:
Group blog:        ( http://i-love-pahang.blogspot.com/ )

Sunday 21 August 2011

Tan Poh Yee - Accommodation

Description on the individual ideation of the link
The thought of the site is designed to introduce the places of Pahang state. The four places that we have chosen for Pahang are Genting Highlands, Cameron Highlands, Taman Negara, and Pulau Tioman. The ideations of the links are transportation, accommodation, activities and so on. Accommodation link is to help the viewers to grasp about the staying places of few tourism spots in Pahang. Links are easily associated and located in order to make the information flows straight forward to the viewers.

Objective of the link
The objective of this link is to let viewers know about where to stay and what type of services available for tourists in these tourism places. Besides that, it also shows how the accommodation provided attracts the tourists to visit which acts as one of the methods to promote Pahang state.

Design of GUI: 


A banner is being designed to promote Pahang state using Photoshop. The banner will be located at the top of the site and there are links such as home, destination, accommodation, transportation and also activities in order to provide viewers more information on tourism places in Pahang. As mentioned, there are 4 famous spots that we would like to emphasize on in Pahang which will be located at the side bar. Links are all easily connected and accessed to get details of each places and also it can return to home page or associated to other buttons. Below is the sample of how the page will be exactly like after a click on the link.  


Flow Chart of Individual Site:


Basically, each place will mention about their own accommodation. Flash video is being created to introduce the four tourism places. Besides that, Adobe Photoshop is also used to edit and create the banner for the site and some pictures that will place in the website. Dreamweaver will be used to create the website.
References
  1. http://www.rwgenting.com/ (Content for Genting Highlands)
  2. http://www.cameronhighlands.com/balas_chalet/ (Content for Cameron Highlands - Balas Chalet)
  3. http://www.strawberryparkresorts.com/ (Content for Cameron Highlands - Strawberry Park Resort)
  4. http://tiomanguide.com/hotel/tio/gentingbayu/room.htm (Content for Tioman Island - Genting Bayu Chalet)
  5. http://www.bagusplace.com/home (Content for Tioman Island - Bagus Place Retreat)


    Soong Mei Lin- Transportation

    Hi! My name is Soong Mei Lin and I'm the group leader of this project. I'm going to be in charge of the transportation button that will be available in our website. 

    Description on the individual ideation of the link
    We had chosen Pahang as the state that we would like to write about and with that, we had chosen another 4 tourist spots as the main idea of our website.
    We had chosen Genting Highlands, Cameron Highlands, Pulau Tioman and Taman Negara. My idea for the button "Transportation" is to link from the "Destination" that another member of mine that will be doing to the transportation page. For an example, usually users will click on "Destination" for ideas of where to visit in Pahang. WIth that, they would want to know of means to get to their selected destination. My idea is to insert a link right below every destination to lead the reader to the Transportation page immediately. This way, they can immediately go the transportation page without having to scroll up to the transportation tab.
    Besides that, the transportation button is to enable the users who already knew where they are going without having to go through the destination page to browse through options available to get to their selected spot.


    Objective of the link
    To provide users with means of transportation in and out of the selected destination and to make it easier for them to make early bookings with their selected means of transportation there. Numbers of taxis and van and operating hours will also be provided in this page.


    Design of GUI

    This is the interface for my button. As you can see, right after you click on the transportation button, it will immediately come to this page. First I will use photoshop to photoshop the photos of the destination. The name of the place will be on top of the picture to indicate that this is what they should read if they choose this place. I will link the title of the place back to the destination page.


    Flow Chart of Individual site


    This will be the flowchart of my link. Once you click on the button, it will followed by images and informations that you need to know. Other than that, quick links will be provided to proceed back to the Destination place. 


    References : http://www.hoteltravel.com/malaysia/pahang/guides/transport.htm
                       http://www.virtualtourist.com/travel/Asia/Malaysia/Negeri_Pahang/Transportation-Negeri_Pahang-TG-C-1.html


    Thank you! =D 
    Time to hit the sack!


    Thursday 18 August 2011

    Tan Chin Hwa - Activites

    Here comes the final project of Digital Media 1! In this project, we are suppose to create a website with a theme of  "Promotes Tourism - Malaysia Holiday Destination". We are in a group of 5 and each of us have their own task to do. My part would be to create a page about activities in Pahang. 

    Description on the individual ideation of the link

    The idea of the link is to provide information regarding the activities in the four places that we chose for Pahang
    which is Genting Highlands, Cameron Highlands, Taman Negara, and Pulau Tioman. There are links for
    transportation, accomodation and so on, hence definitely the viewers of the site wants to know what they can 
    do at those places. That would be the ideation of the link called "Activites".

    Objective of the link

    The objective of this link is basically to inform and attract the viewers about the activities in the four places. 
    There will be information on what they can do at those places, when will the activities be available, how much 
    they have to pay for certain activities and images regarding the activities such as jungle trekking, diving and 
    so on. I would like to enable the viewers to gather their information with little effort on their side so, I would divide 
    the activities into their respective places and just within few clicks. 

    Design of GUI

    We have decided to divide our website into four famous places of Pahang which is Genting Highlands, Cameron Highlands, Taman Negara and Pulau Tioman. Since there are four places and there are many activities in each 
    place, so it would be crammed up if all the information are being simply put into one page. Hence, I decided to
    design my interface like below.


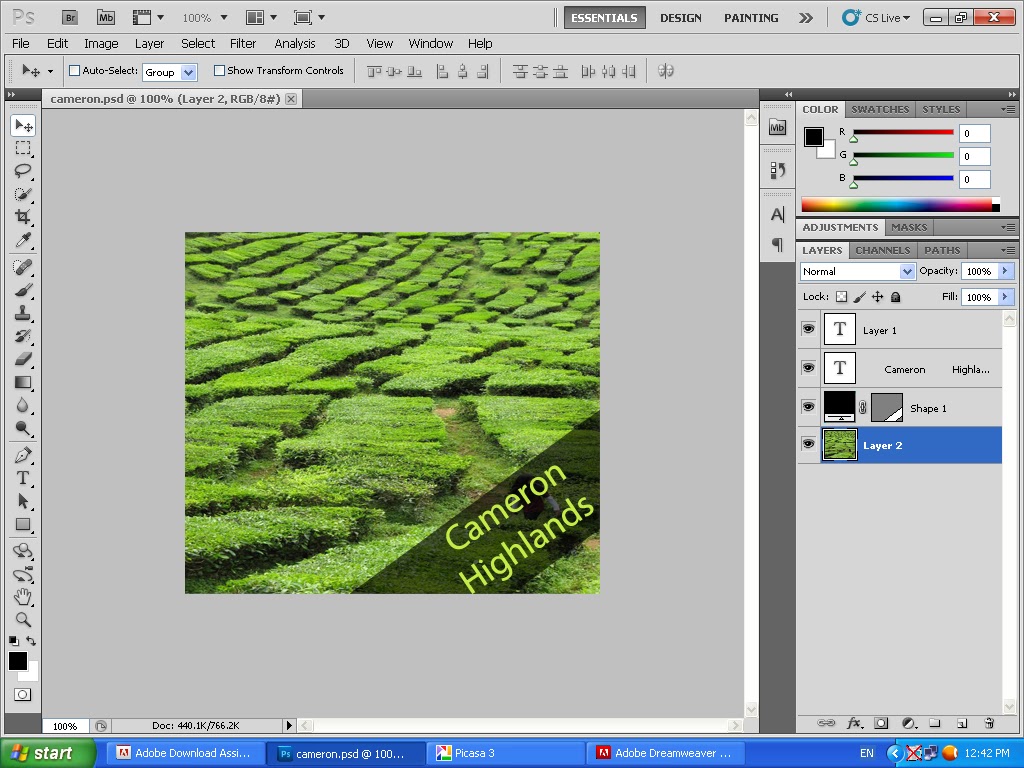
    The screen shot above will show the page after you have clicked on Activities on the Home page. The four small
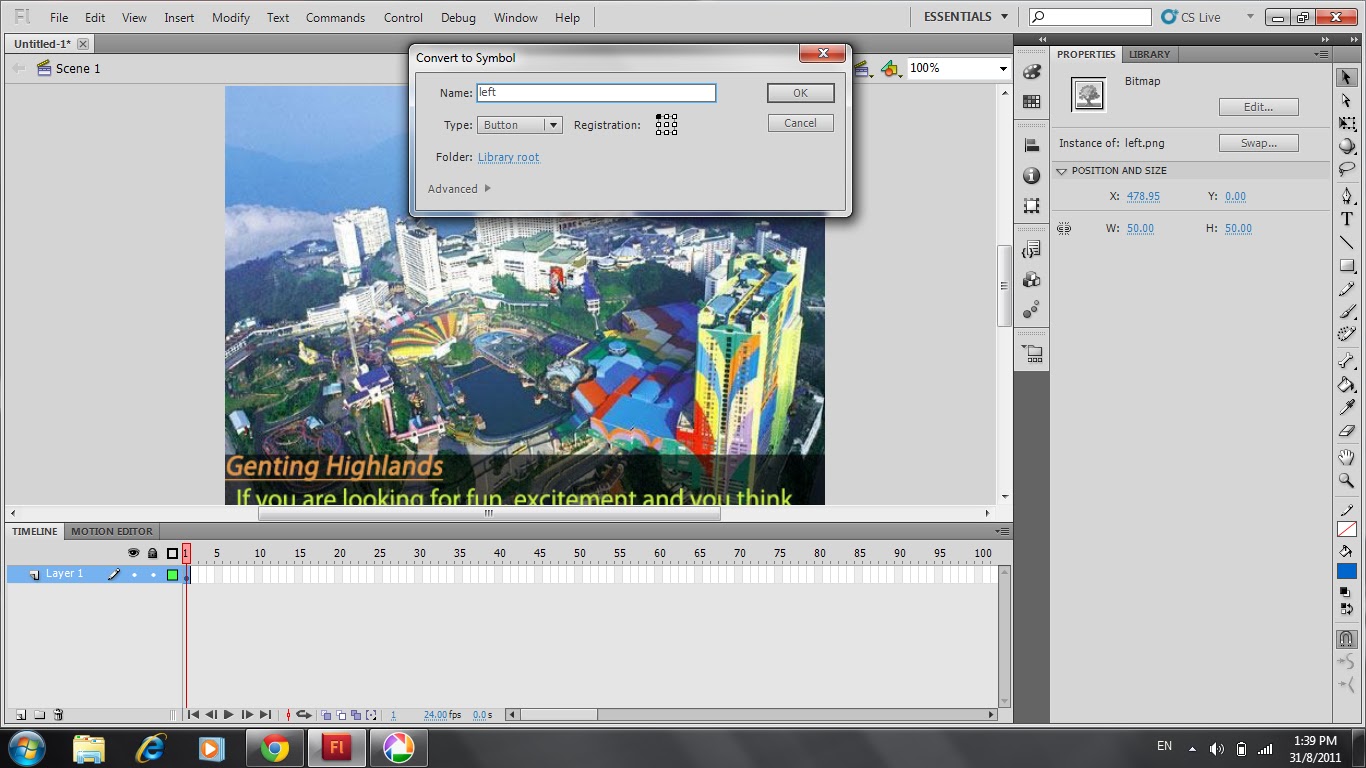
    boxes on the top half page would be the buttons that link to the four places. I plan to use pictures with a vertical
    text in each of the boxes as buttons. I will use Adobe Photoshop to help me on that. And, for the big box at the 
    bottom half page, I would like to put a slide show or maybe an animation regarding the activities in those four
    places. In this case, I would use Adobe Flash to help me. 


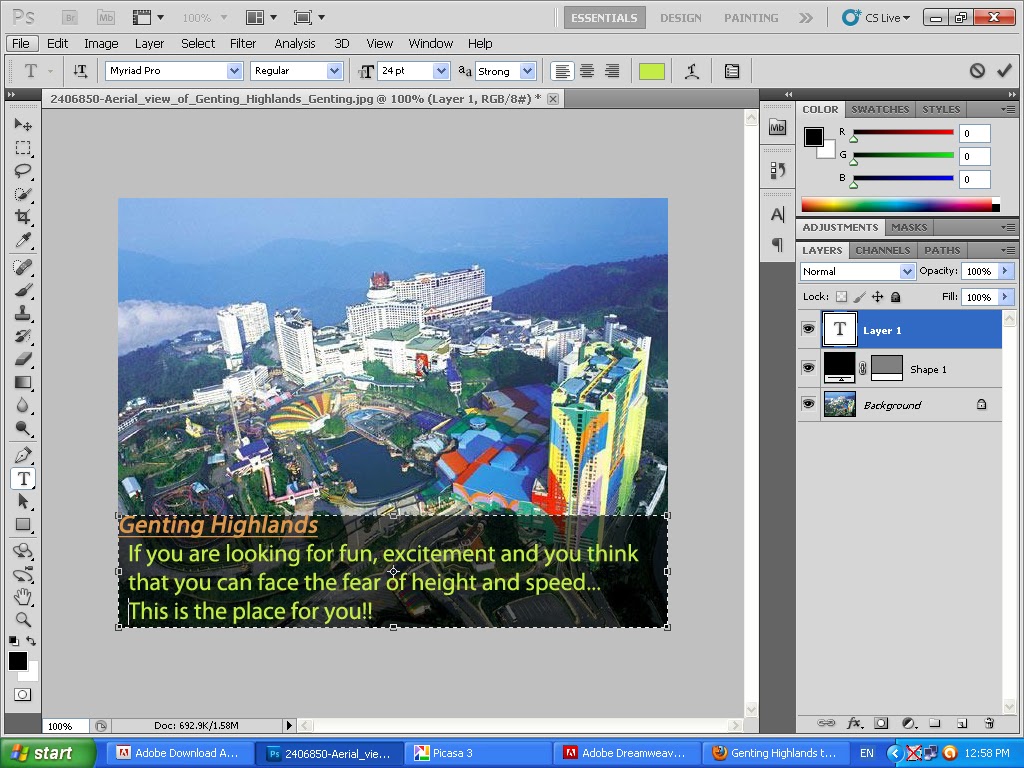
    As for the layout above, this is what I planned on how to arrange my information when you clicked on any one of 
    the four buttons. There would be pictures of the activity and information on that activity itself. I believe by this way, 
    people could find their information easier. And if they want to get information on other places, they can just go
    back to the Activities page and choose from there. 

    P/S : Please note that the design of GUI did not include the banners and buttons for the whole website. This is 
    because there might be still some changes in the home page. 

    Flow Chart of Individual Site


    This is the flow chart for my link. Basically, under Activities there will be the four places that I've mentioned before 
    and below each place, there will be images and text to inform the viewers about the activities they can do there.  

    Reference

    For now, I already have some references where I gather information from. I will find more references for pictures
    to put into the website. Here are the references. 


    I'll be back with more updates. Thank you. :)

    Wednesday 10 August 2011

    Responsibilities

    Everyone was given one button each to work on.

    History : Shafiq
    Destination : Joffi
    Transportation : MeiLin
    Accommodations : Poh Yee
    Activities : Chin Hwa

    Everyone will develop their own buttons according to their own likings.
    The dreamweaver work will be shared among all of us and the photoshop will be done by anyone who is free and will be posted on this blog.